Shooting in Paradise by Riccardo Mantero:
Let’s begin by debunking a few myths.
Tropical paradises aren’t always paradises, and shooting there isn’t always rewarding. There are mosquitos, dangerous parasites, extreme weather and environmental conditions, and a lot of scarcely-documented adverse situations that can harm you, or even worse, can damage your beloved equipment.
But!
But, in my opinion at least, it’s much better than shooting boring old ceremonies or risky riot situations.
So here I present to you some of my notes of the experiences I’ve gathered in my many adventures in and around some fantastic tropical seas such as the Caribbean, Maldivian, African, or even in some European paradises. Clearly they’re all based on what I’ve come across, along with my goals, which are basically to bring home at least one or two decent – and high quality – shots from every place I visit.
First of all, let’s talk about the equipment. Basically try to travel light. Usually the temperatures in any tropical zone is hot, warm and humid. So bringing too many lenses with you, or indeed, stacks of heavy stuff, is not often a great idea. You have to plan carefully what to bring with you.
Second, bring high quality gear, camera and lenses. Tropicalized is better. Again, high temperatures can affect and deform any low budget equipment, along with water, or salt, or plenty of other little damages and problems that can be mitigated if you’ve got the right tools.
Third, the tripod. Do aim for a good compromise of lightweight and sturdiness. And this brings us only in one direction: the carbon. See the Genesis C3 for example; it’s lightweight, sturdy and affordable. Plus, opt for a stable, compact head. Now I’m not a real fan of ball heads, but after several experiences, I’ve concluded that they are the best compromise between portability and stability. When I travel close to home or I can leave with my car, I usually have two tripods with 3D or “pano” heads; okay, these are more bulky, but they are more precise and easy to manage. But when there’s a flight – and I plan to travel light – I bring only one tripod, and the much lighter it is, the much better it will be.
Make sure you store everything in a truly waterproof backpack. The tropical storms or monsoons aren’t what I usually call “rain”; they’re as if someone’s pouring buckets of water on your head, and even worse, on your equipment.
Bring filters and triggers. Filters, as you’ll be taking long exposures (or use Neutral Density or Polarizers), and a trigger (or two, one as backup) because in such places you can do several kinds of photography such as time-lapse, or long exposures, or even shooting by night (in a lot of tropical paradises the light pollution is very limited, so the stars can be great subjects).
Last but not least, bring cleansing kits and blowers. Salt may be the real enemy of all your kit, but sand and water aren’t exactly its best friends either.
My backpack, for example, holds:
- A lightweight zoom (I use the Nikon 70-200 f/4 instead of the f/2.8 which is really heavier than the latter). Eventually you may well need a teleconverter if you plan to shoot something farther away (don’t forget, we’re talking about landscape photography – not safari – but it may well be that there will be some far-off detail or some interesting animal that will catch you by surprise, so a zoom can be useful).
- Two wide-angle lenses. One extreme (Irix 11mm f/4) for extra-large wide shots, and one more canonical (Irix 15mm f/2.4); they differ in luminosity and in filter availability. Opt for the Blackstone version; it’s tropicalized and more robust.
- Two camera bodies (Nikon D850 and Nikon D810) for several reasons: swapping lenses in dirty places isn’t healthy, and you will do that anyway, perhaps even too often. Furthermore, you can leave one body shooting a long exposure or a time-lapse while you do something else with the other. And – the most important reason – because it’s bad to remain with the one single damaged camera body on a tropical island.
- Filters. You’ll need polarizers: “Big Stoppers” with a Neutral Density (currently I’m using the Edge ND1000, Edge ND32000, which can add 15 stops). Also EDGE Graduated Neutral Density slide filter systems; in this case I prefer the soft ones and something like ND 0.9 in order to combine them with the Big Stoppers and achieve progressive hues.
- Batteries, battery packs, and memory cards. In several places I visited it wasn’t exactly easy to charge up the batteries or backup your data unless you have access to solar panels and battery banks. Take them by all means, but they are heavier than some charged backup batteries.
Now we’ve completed the equipment section, it’s time for those general tips for successfully facing the paradise challenge; well, from the photographer’s point of view at least.
One of the most challenging subjects in tropical paradises is undoubtedly the water. Its main peculiarity is the colour. Obviously the colour of water is the same in all seas, but what really makes the difference is the sea floor. The coralline sands are usually white so the final result, together with the blue sky, is a dreamy crystal green colour. When a landscape photographer finds themselves in front of an all-to-overwhelming place, their goal is to capture it in all its splendour, aiming to bring home the most dreamy, stunning and enviable shots of the location.
Now here I’ll post some tips, along with the techniques, that I use to capture really effective shots of tropical paradises.
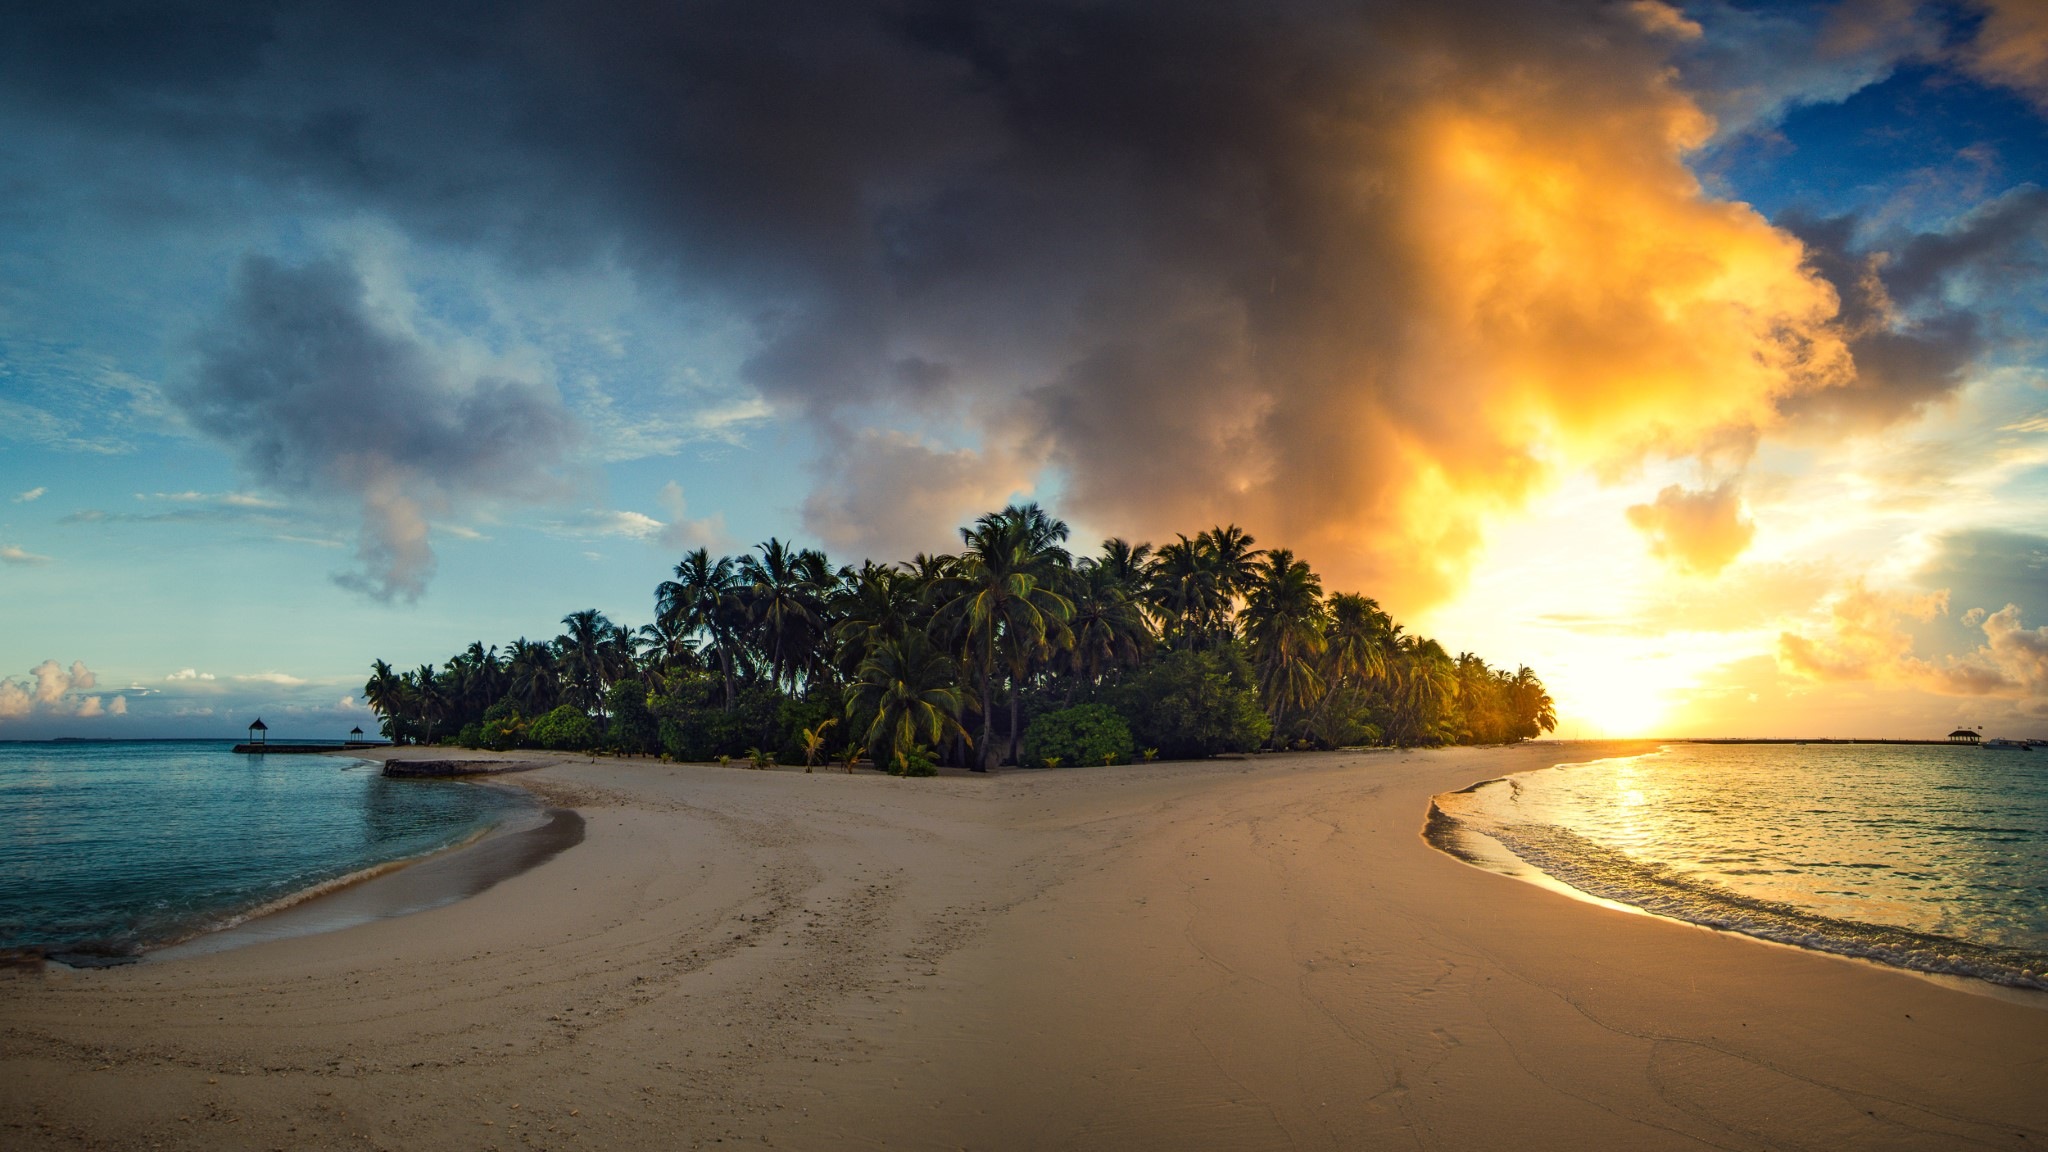
First of all, the field of view: the larger, the better. The trick here is to give the observer the illusion of vastness of the setting. Let them feel like they are the lucky ones who are living the dream of finding a lonely, uninhabited, small island, or a far-off lonely beach. For this once, forget the classic rule of thirds; placing your main subject in the middle of a lot of crystal water is, in this case, a captivating composition. If you’re too fearful of using a full centric composition, then subdivide your shot into two thirds for water and one third for sky (or vice versa according to what’s more interesting). In this case – and if you’re in favour of the sun (behind you) – you won’t need to use a polarizer; the Irix 11mm f/4 is the game changer. With its vast field of view, it will return a very wide perspective.
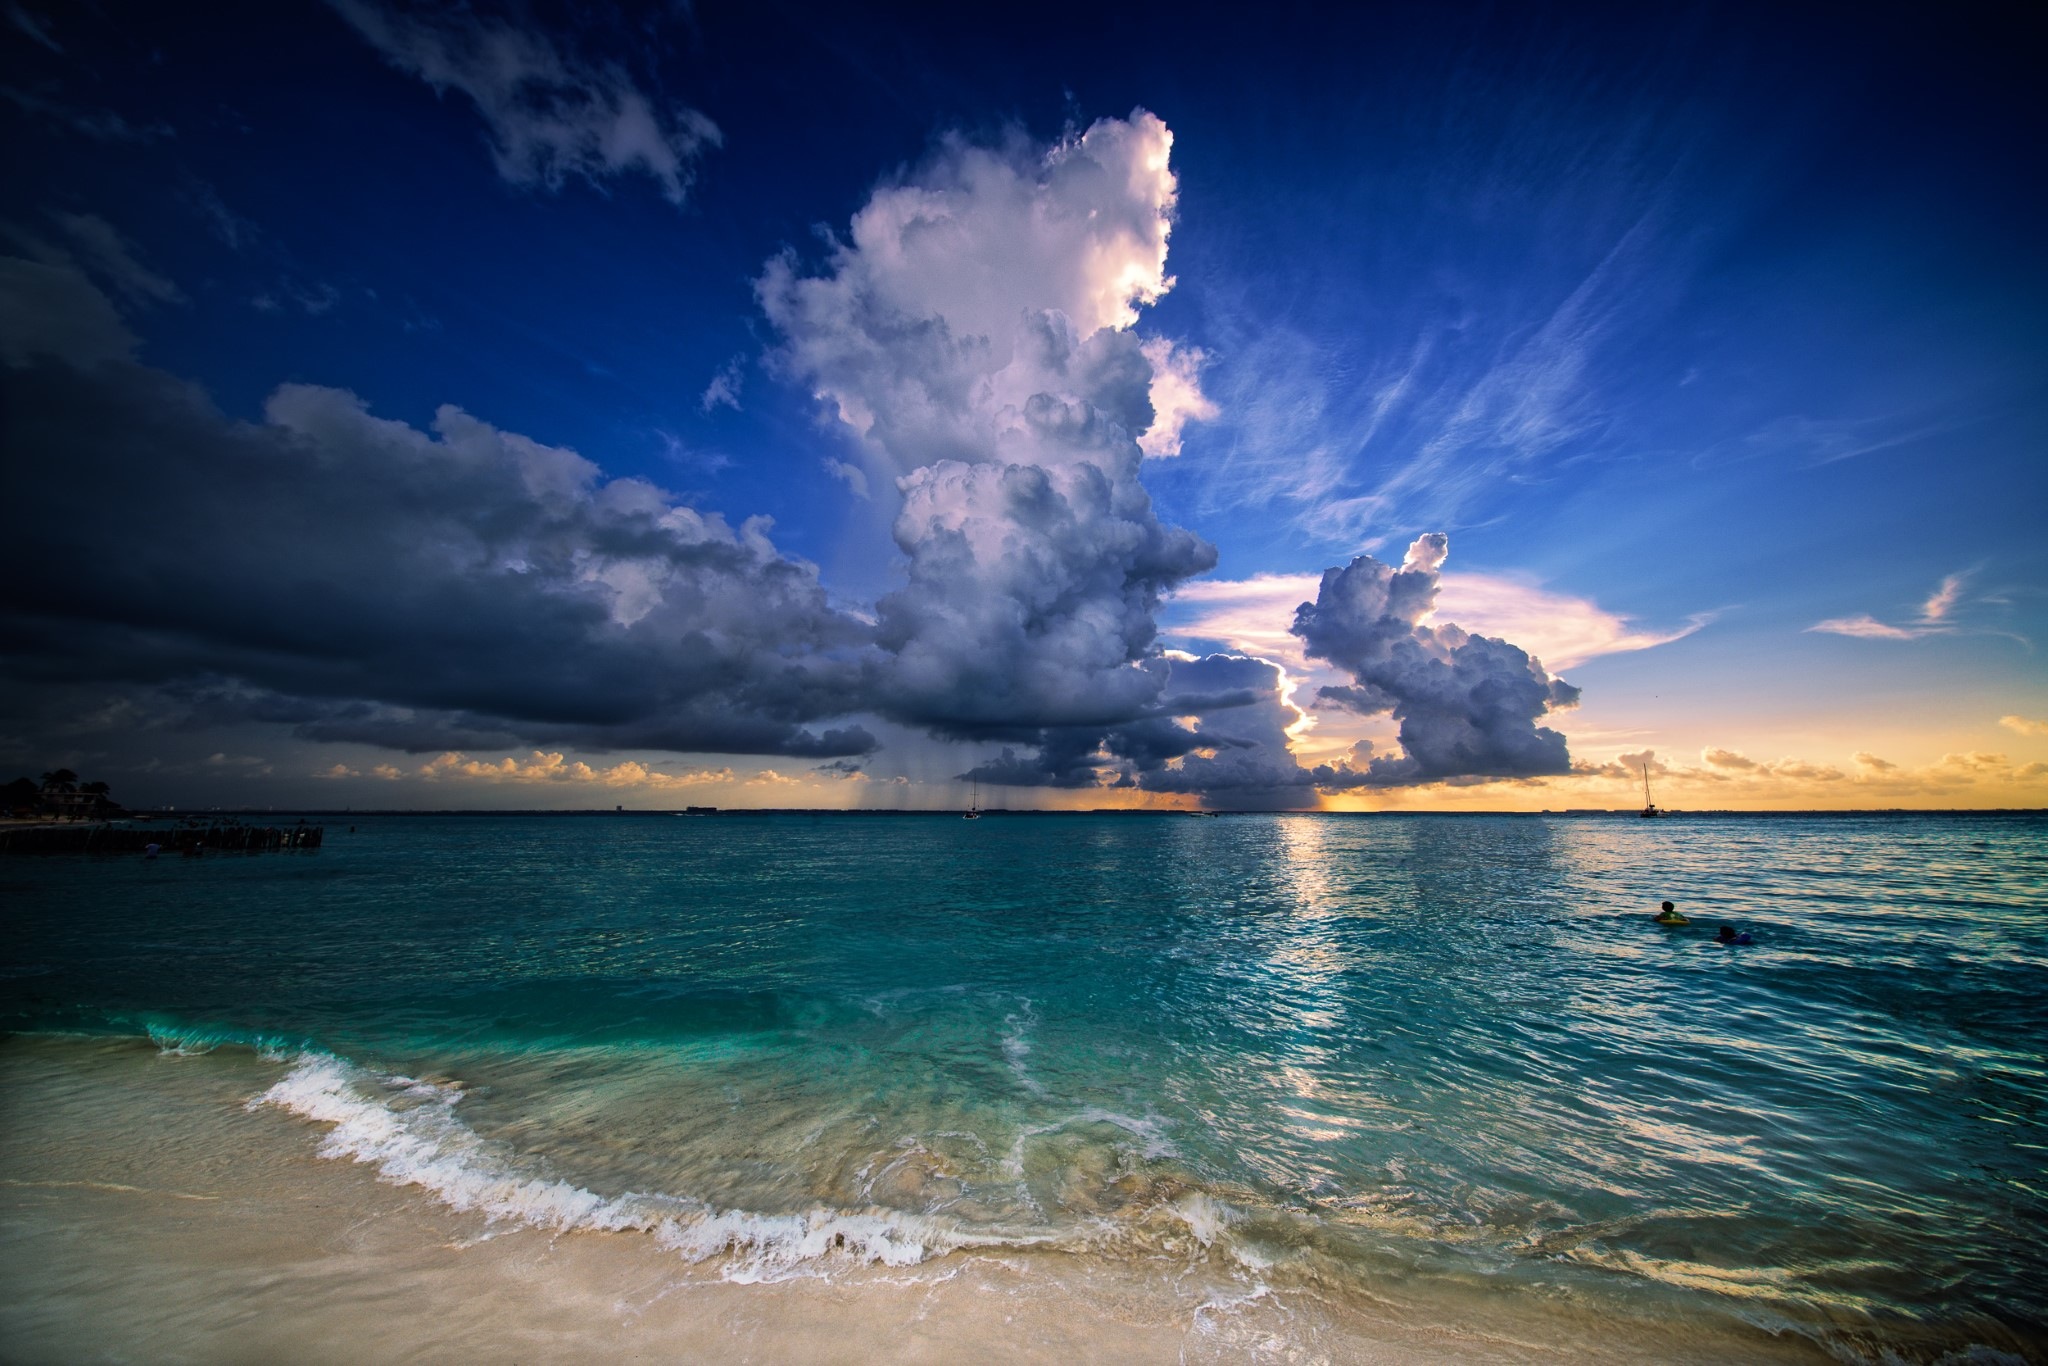
Just kneel down, or get closer to the water as much as you can, and use a fast time; at least 1/1000, with the lens aperture in its sweet spot, in order to freeze the movement of the waves and capture all the depth of field from your position to the horizon. As a plus, try to capture the underwater textures of the sand, if there are any.
Exploiting the enormous field of view of the Irix 11mm f/4 – for example, in this shot, and shooting close to the surface without any point of reference or objects nearby – has allowed me to give the illusion of being in open seas and really far from the beach. But in reality I was actually less than 10 metres from the sand, with the lens at least 20cm from the water.
When it comes to post production, in this case – and this rule is worth it above everything else – I recommend, with photoshop or Lightroom, cleaning any disturbing little floating thing or anything that is on the bottom of the sea; little algae, small stones, if any. The final result should be something that makes the observer dream of being there every time they look at the photograph.
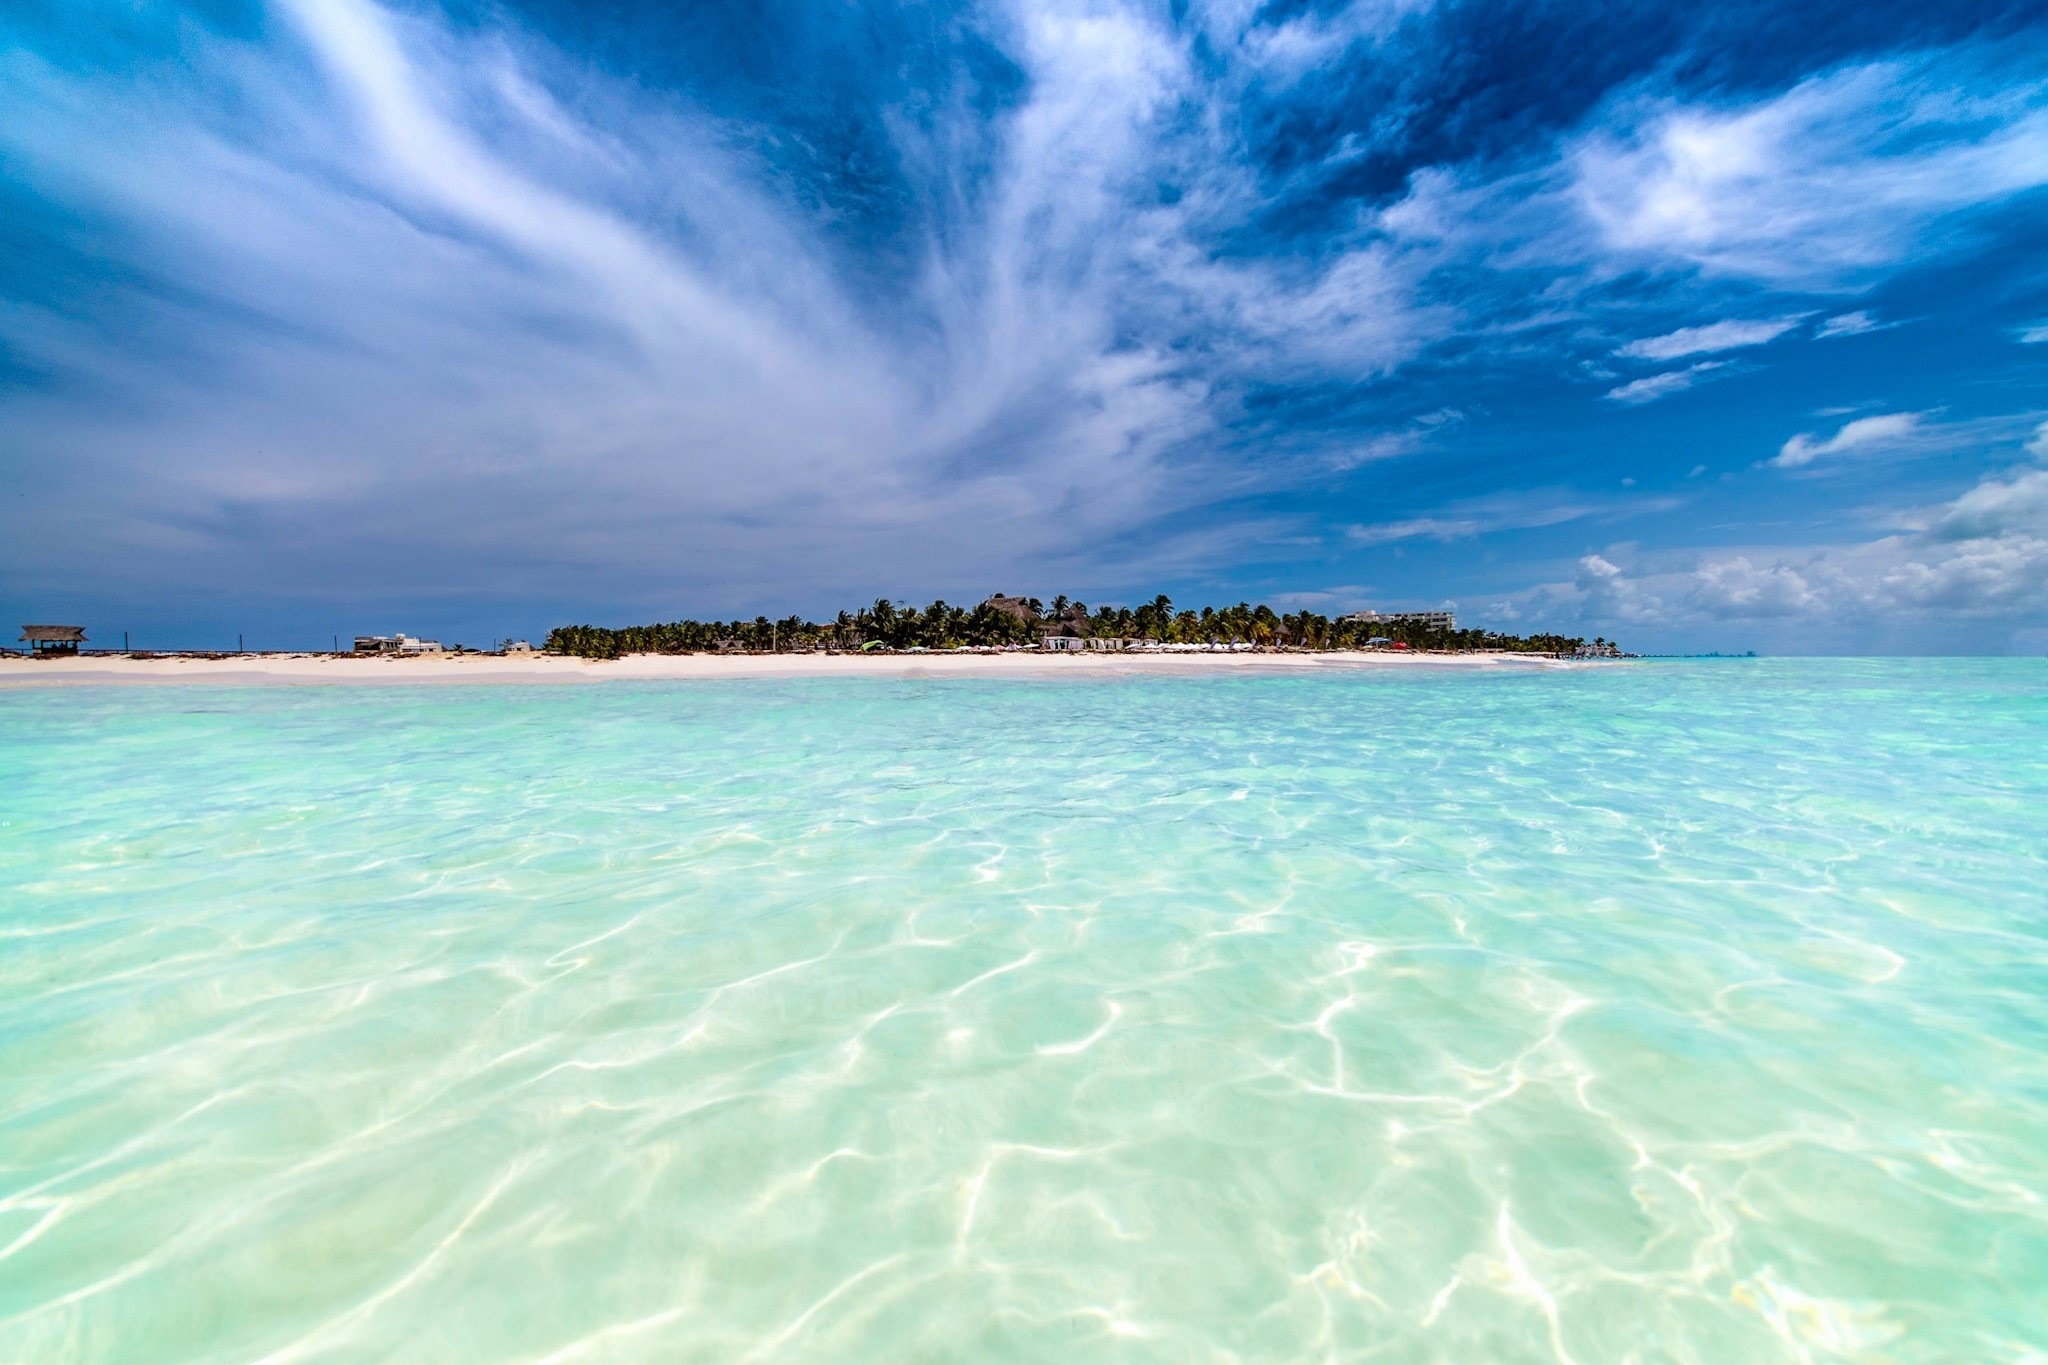
Another way of capturing a stunning tropical water shot is to use a polarizer filter – for example, if the light or the sun isn’t in the perfect position; let’s say it’s at the side. Through this it’s possible to remove any reflection or reverberated light on the crest of the waves. The main problem is that the Irix 11mm can’t mount a CPL, so you will need to use a different lens.
In these cases you must accept that you have to broaden your field of view in return for the opportunity to mount a filter. In this case you can screw the Irix 15mm f/2.4 on your camera, along with an Edge CPL filter. Once you’re set, just avoid any exaggerations by tuning the CPL. If you crank it up too much, especially on a ultra-wide angle lens, then the final result can be ruined by some halos or dark areas of the sky on one side of the photograph. But, if you carefully tune it – doing some tests obviously – you will capture a high contrast image with some fabulous water as its main subject. In my example, on Isla Contoy, out of the Mexican Yucatán Coast, the moving water is in the middle of two crossing streams; one is from the open sea and the other from behind the coral reef. The result is this wavy texture, which I find really enjoyable. Even if the bottom of the sea isn’t visible, the reflection of the sun on the wave crests is very limited.
One other trick I love to use in some cases, especially those when the wide view of the 11mm won’t be enough, is stitching together multiple shots. Just compose your landscape by shooting several photos in portrait orientation, and then stitch them together with a dedicated tool. For that, I prefer AutoPano Pro by Kolor.
Here, the trick is to pay attention to maintaining the main subject in the centre of the frame in order to limit any possible peripheral distortion. Considering that the Irix 11mm f/4 has a very low border distortion, once you stitch together your photos and crop the central zone – maintaining your subject in the middle – you’ll have the perfect landscape.
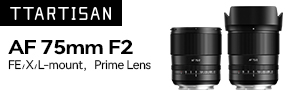
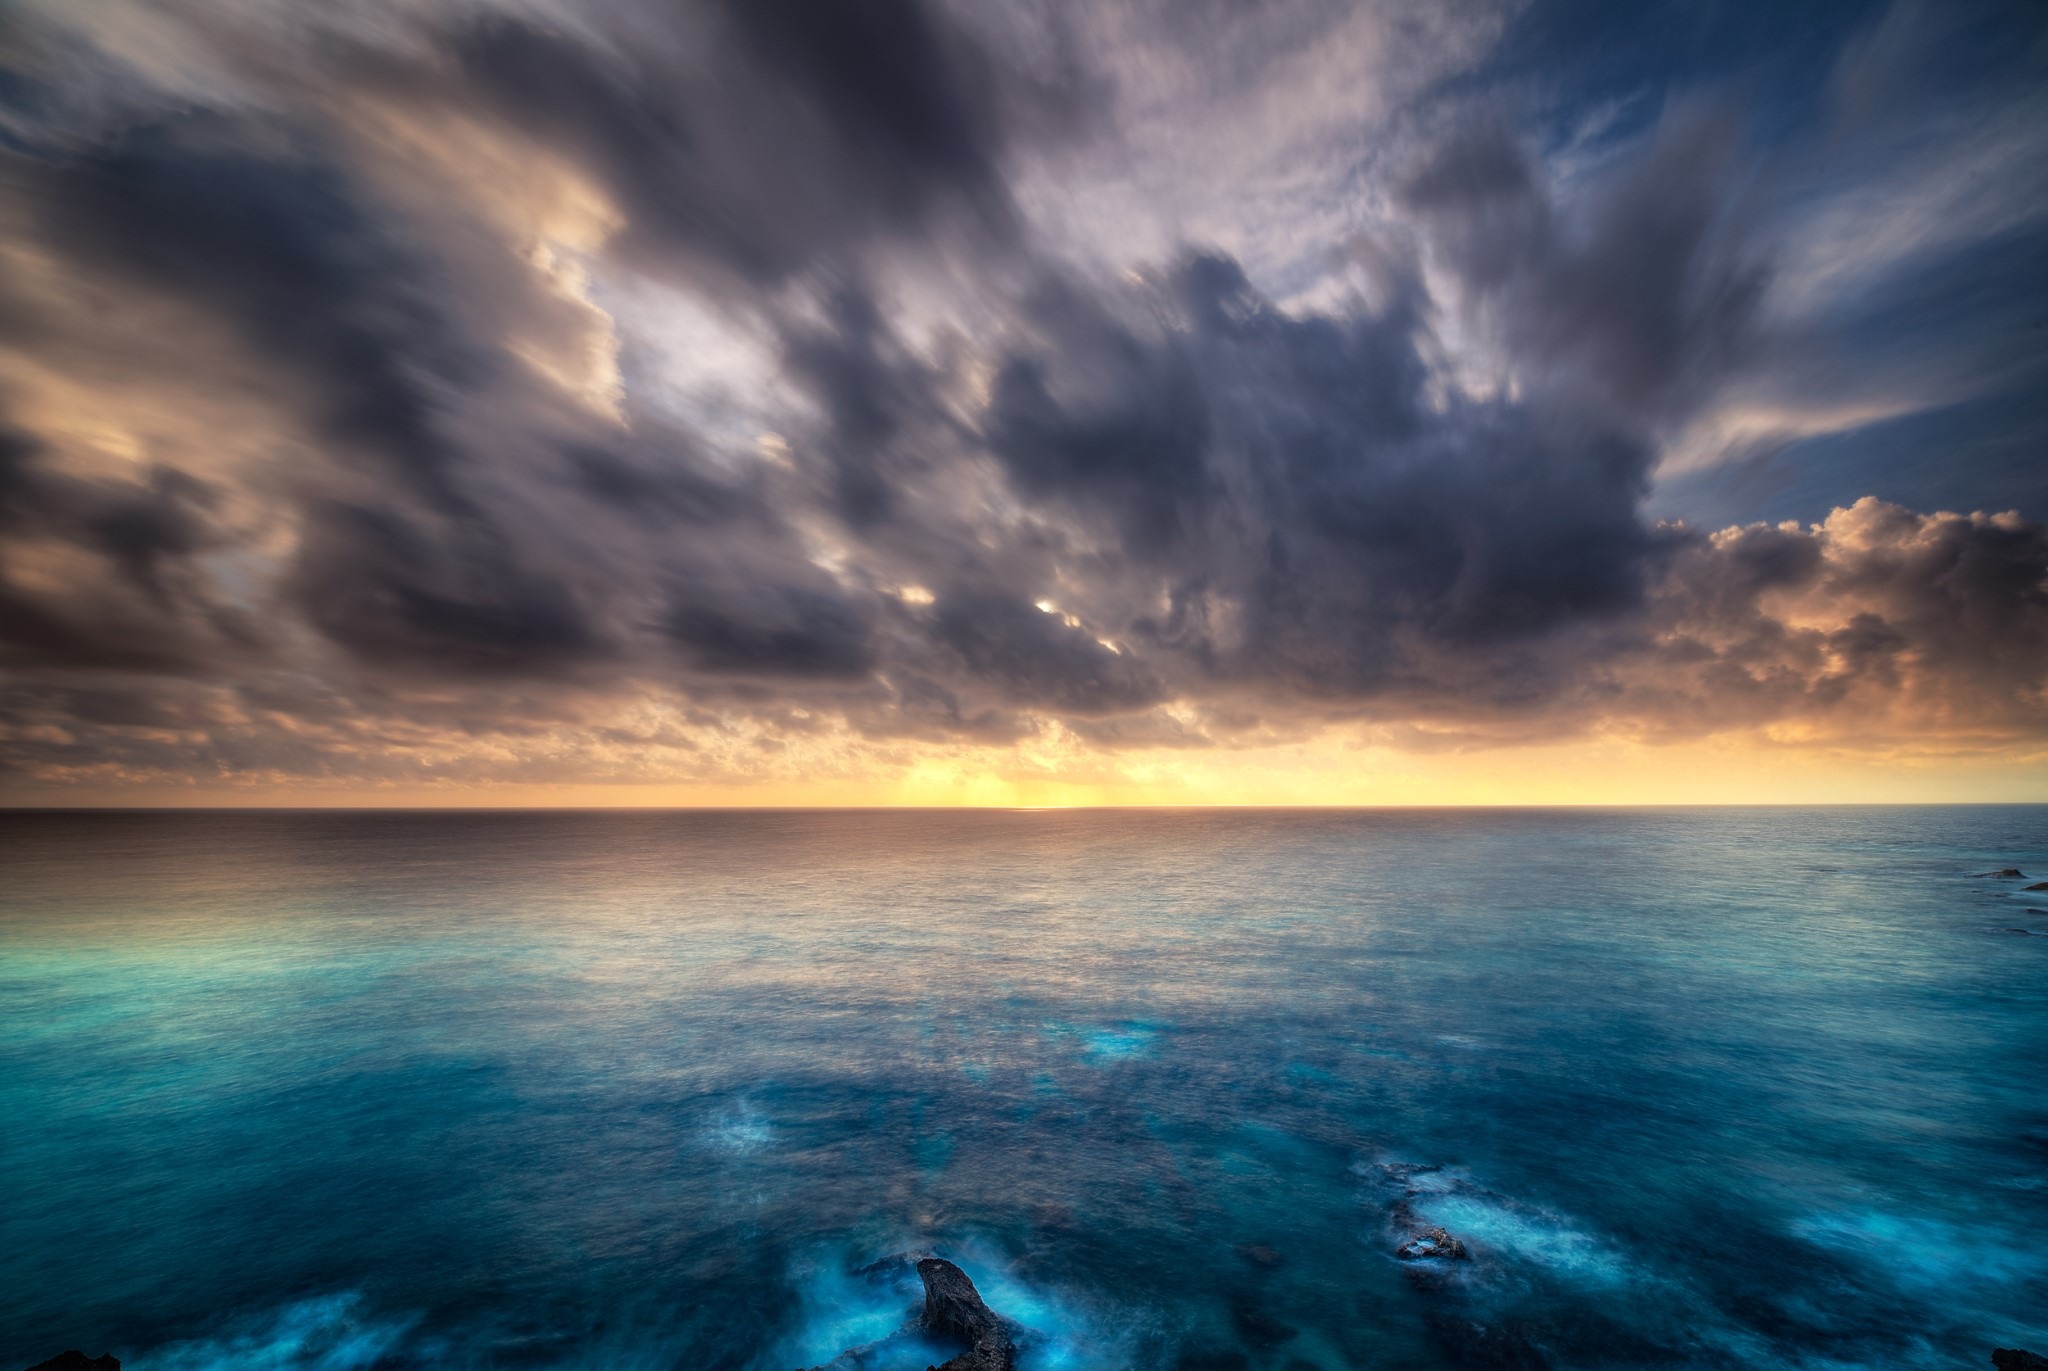
The combination of several long exposure shots is another technique that can be rewarding.
Here below there’s a shot I took just as an exercise to show how it works. The photograph is composed of three shots, taken almost at the same time, but with different exposure settings.
One is a mid-time exposure (around 30 seconds) to capture the foggy-effect sea, the second is a short exposure to capture the horizon and the sun-rays (around 1/125 sec), and the third is a long exposure to capture the moving clouds (50 seconds).
The captures have been made using the Irix 15mm f/2.4 with the Edge Slide filter system. For the longer exposures I had to combine two filters, an ND32000 circular filter and a Graduated Neutral Density slide filter.
In order to capture first the sky, and then the sea, I just rotated the filter hood upside down. But once again, I forgot the rule of thirds here. My bad.
In post-production the three shots have been combined into one single shot using the masking techniques in Photoshop, just by paying attention to using only the upper part of the clouds in order to give the observer the illusion of moving clouds.
Needless to say, for this kind of photography, a super steady tripod and a trigger are mandatory, plus the skill of adding and removing filters without modifying the frame; in this case, the IRIX focus-lock ring is a killer feature.
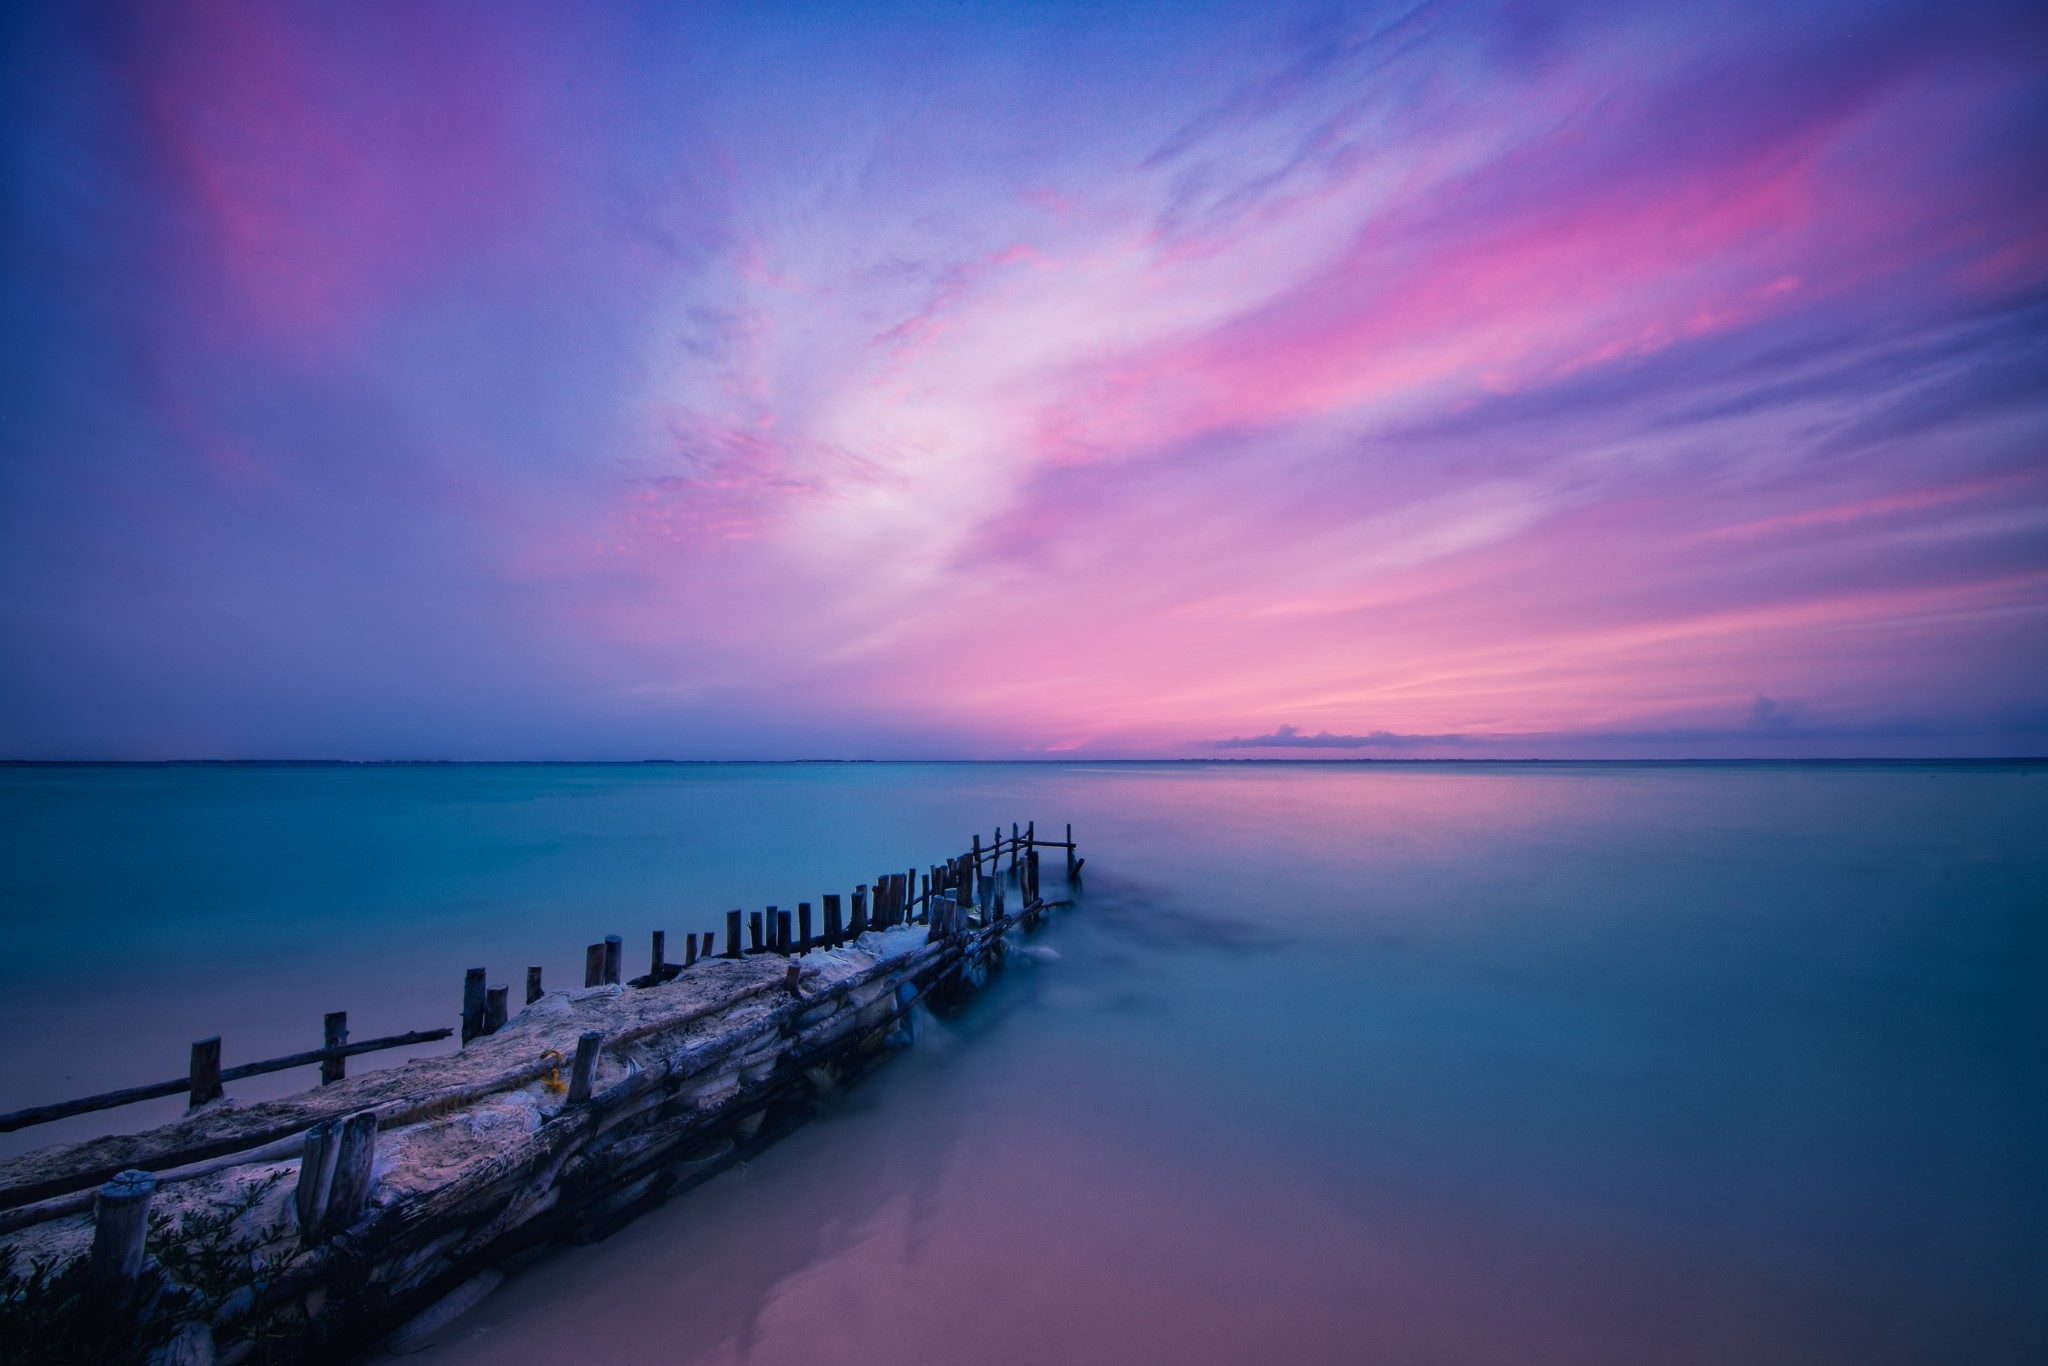
Otherwise it is possible to play with long exposures and water, even without filters, especially in low light situations, such as during the blue hour. In this case, it’s enough to crank down the ISO to its minimum and set an f/22 aperture in order to gain the longest available exposure time.
A good praxis here is to cover the viewfinder with something. (If your camera doesn’t have that feature embedded, you can use any adhesive band or whatever you like the most in order to fully cover the viewfinder.) In that way the exposure meter will be deceived by the light that enters from the viewfinder.
Once you’ve got the longest exposure time (which usually exceeds 30 seconds) you can start playing with the times and apertures and the ISO to achieve the effect. Consider that in order to achieve a good “silky” water there’s not always a working “rule”, but the setting must be varied according on how much the sea waves are moving.
The rule I adopt can be interpreted this way: a perfect calm sea needs an age-long exposure, a stormy sea just a matter of seconds. Again, for these kinds of shots, trigger and tripod are mandatory.
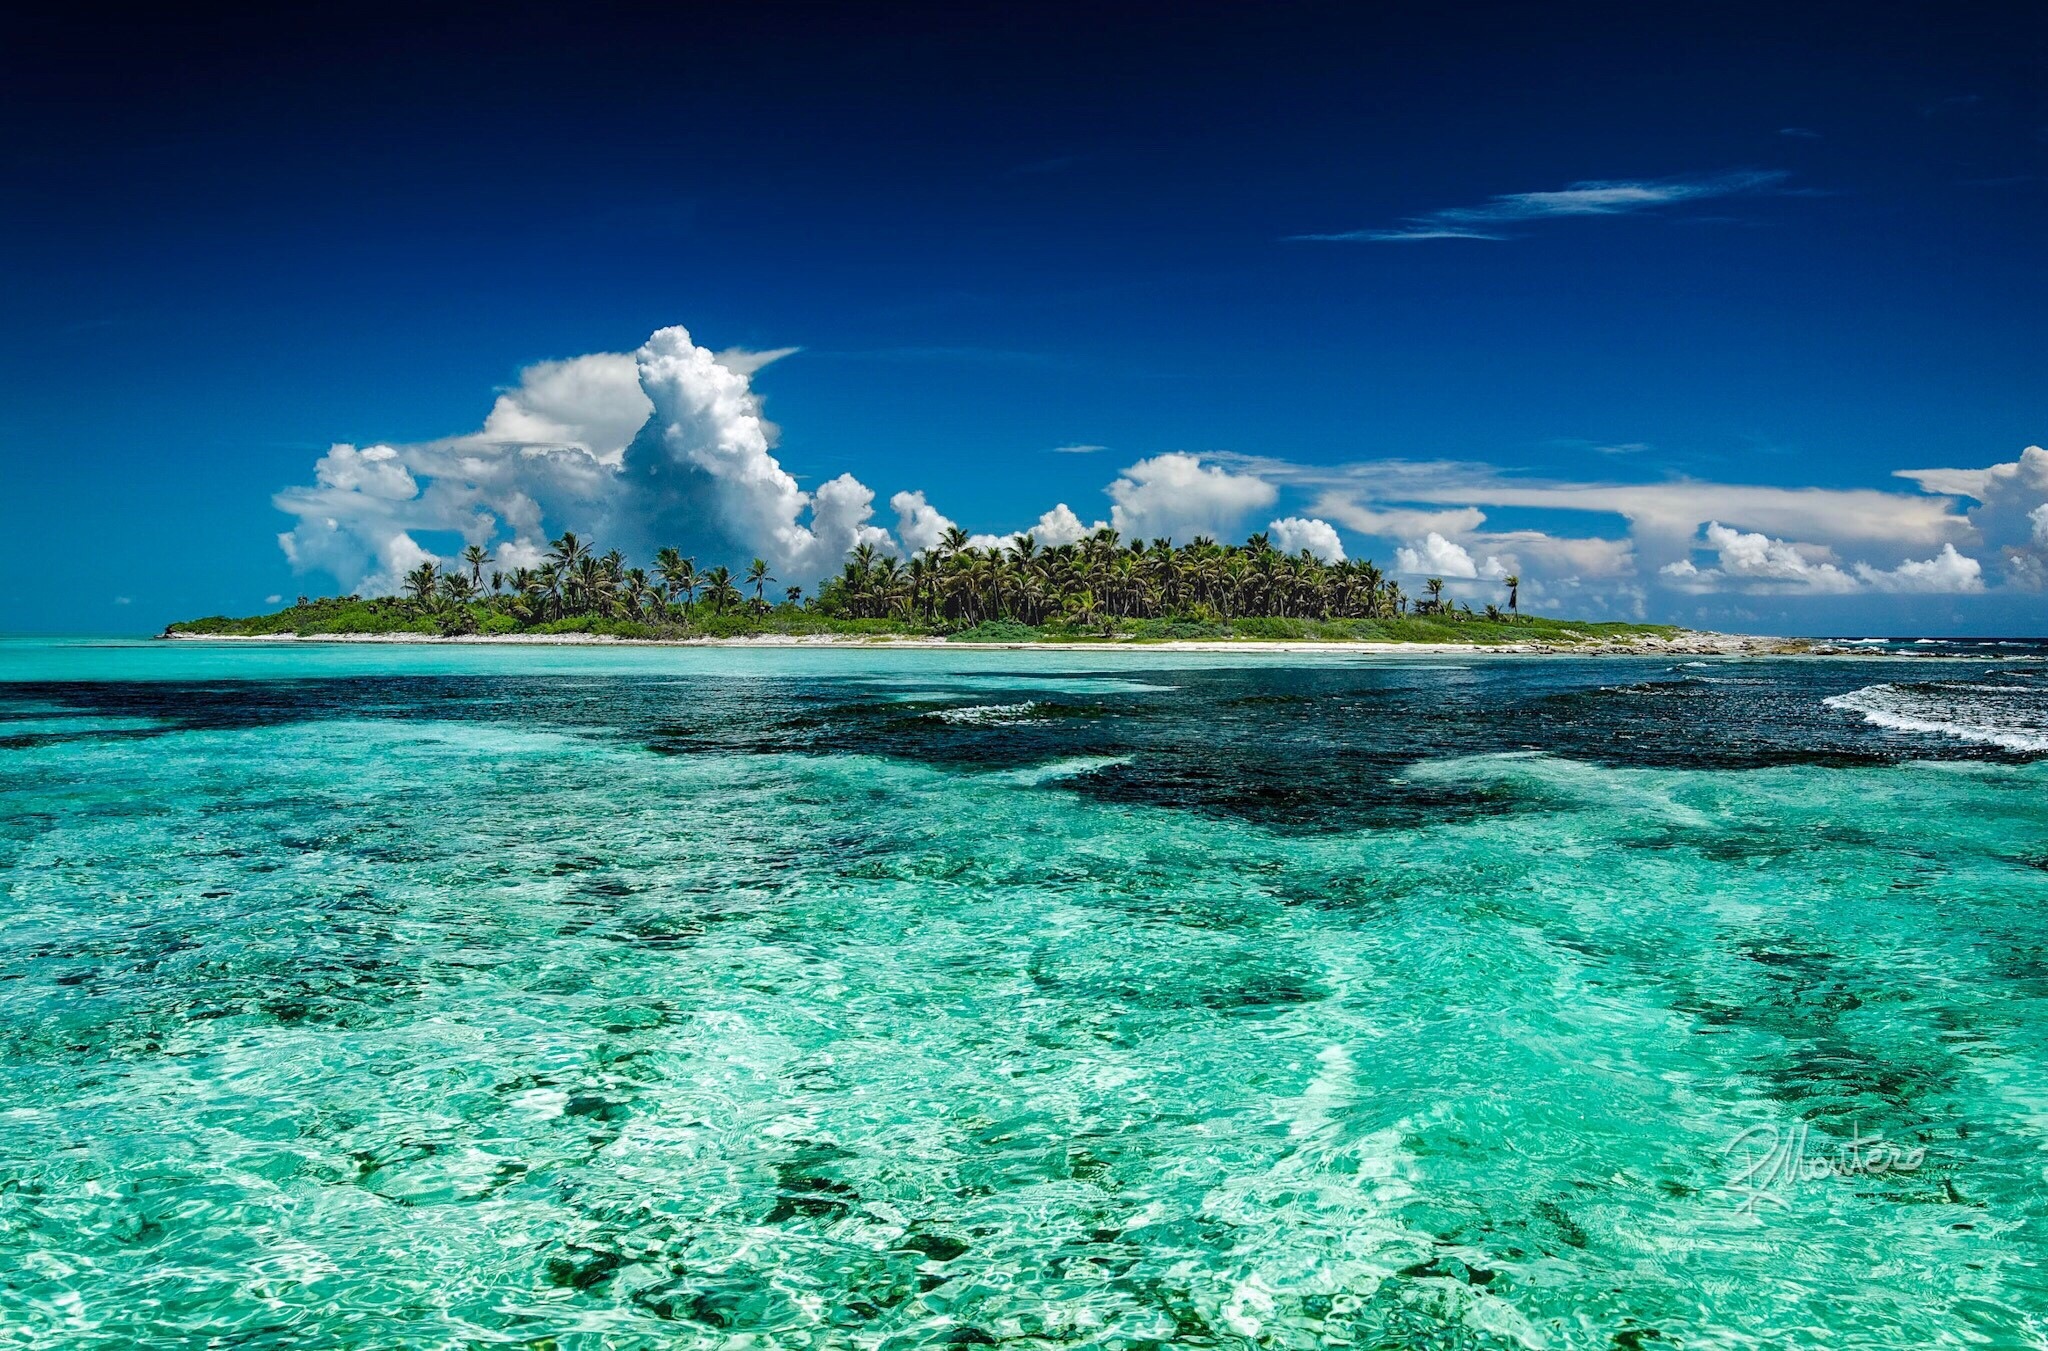
Now I’ve kept until last – but not least – one of the most wonderful and rewarding subjects that a photographer can face when in tropical islands or paradises: the sunsets.
On tropical islands, sunsets aren’t good. They are legendary, but they’re another major challenge. To face this, I can suggest those strategies that I usually adopt. What I try to do – every time – is to let the observer feel small, tiny – to place them in front of the majesty of nature.
How? Once more, here, composition is king. So, kneel down, get close to the ground or water, put your lens into hyper-focal, and let the Irix 11mm do its magic. Capture a huge scene, capture the ground, capture the sky, divide the photo in two sections, and once again forget the rule of thirds.
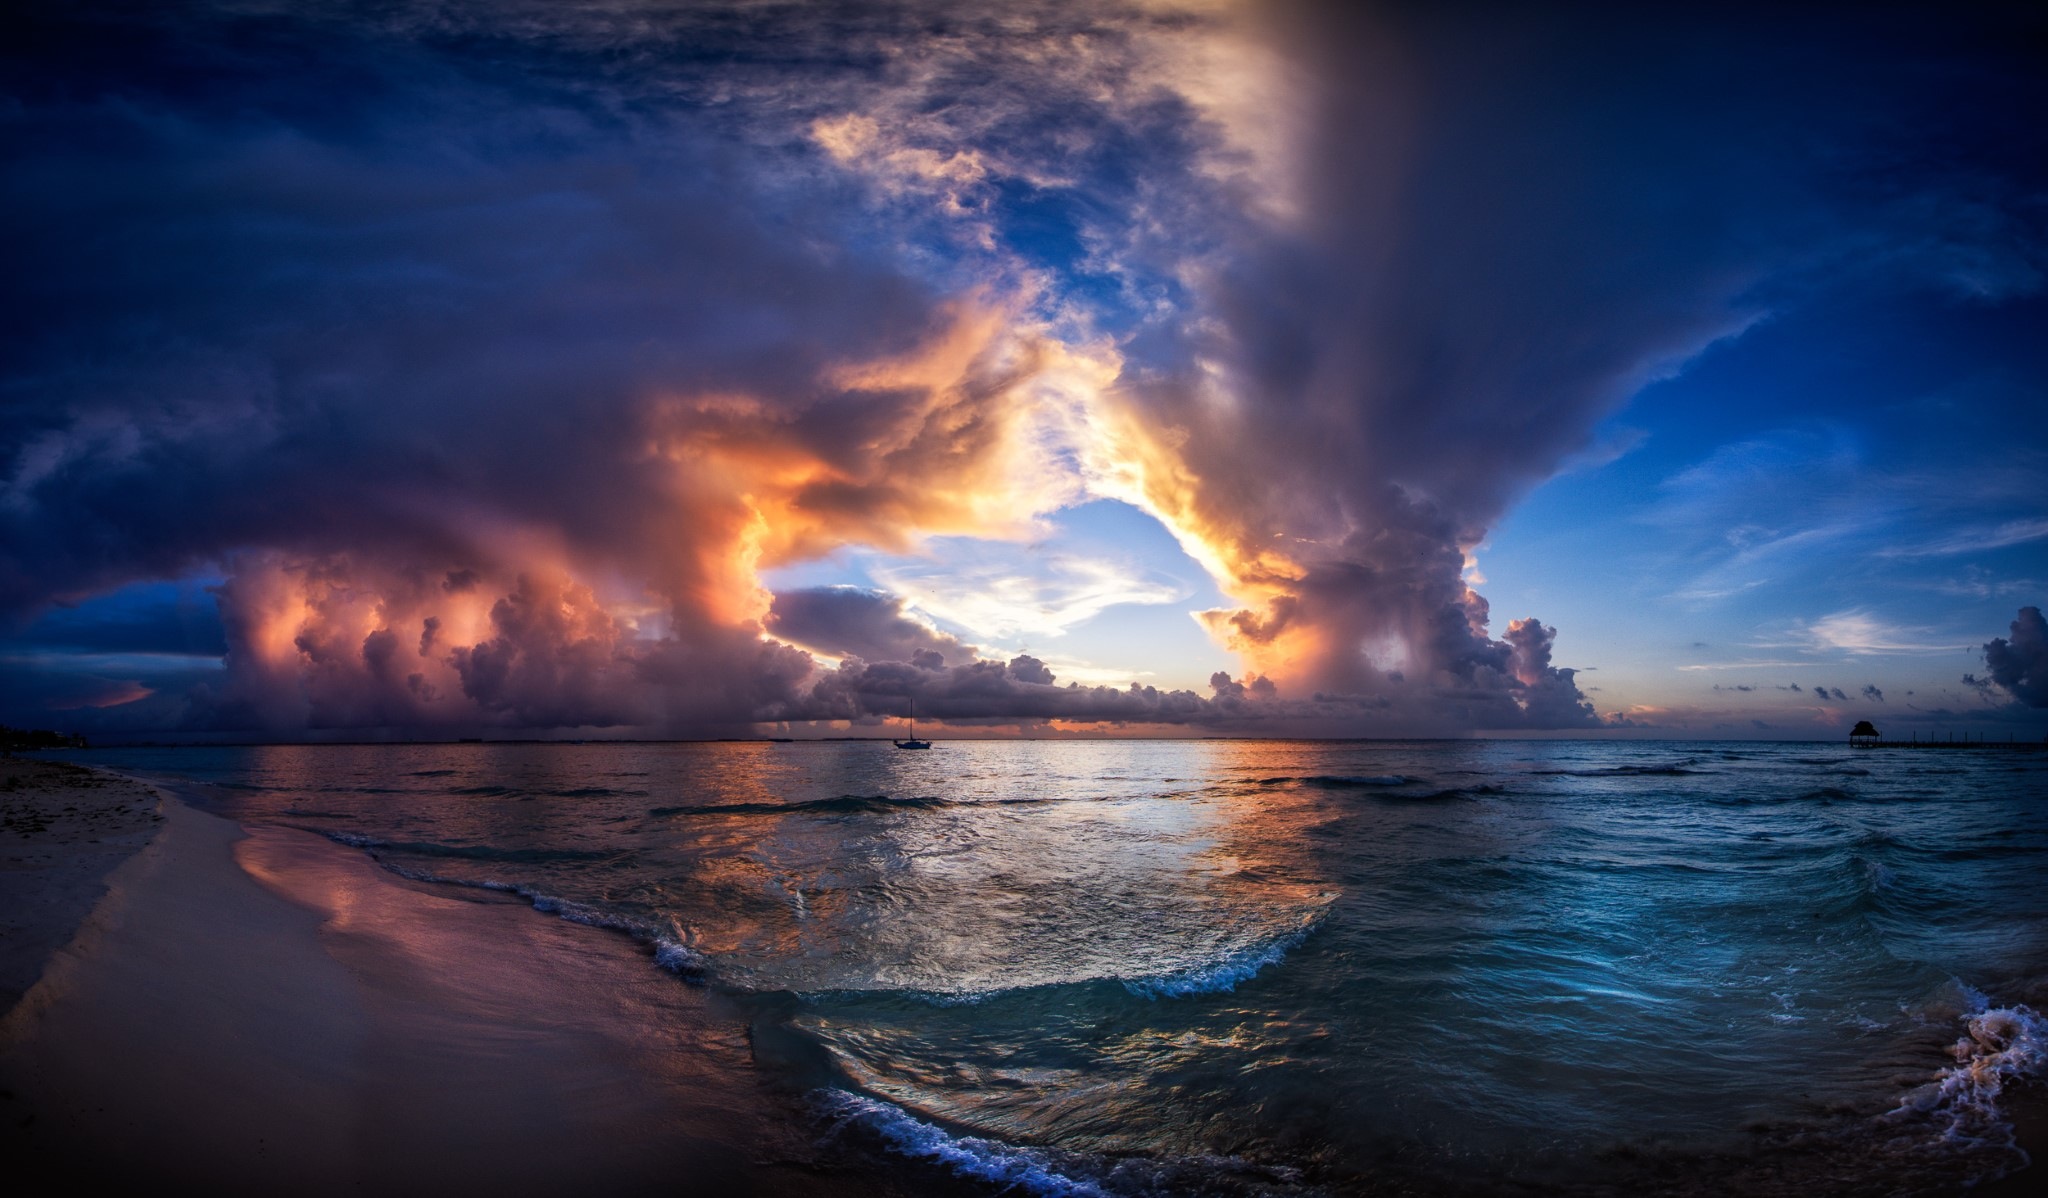
Or, if you want try something more stunning, just stitch a gigapanoramic shot!
Below, there’s the same scene as above, but the final frame is something around 15000×8000 pixels.
Capture all the detail you can, closer and farther, and let your observers feel tiny. And if you can, try to include something that is a known size for perspective’s sake, like the small sail boat there, in the middle.

Okay, I need to end this long post or it’s rapidly going to end up as a book. This is truly something that can be so easily written about, and so much can be said, simply because the things you can shoot in tropical paradises, are almost endless.
For example, during my latest trip I even shot flower close-ups to test the Irix 11mm. The results are really captivating! In fact, just to give you some idea, despite the wide field of view I was 6-7 cm away from the flowers, and I was focusing them not with the focus ring, but by moving in and out.In my opinion the results can be quite interesting and really detailed (in the full shot you can even see the pollen dust on them).
And so the final recommendation I can give to anyone who’s read everything here is this. Experiment. Don’t be afraid of breaking the rules.
Also consider this: if you’re using an 11mm lens, you’re almost already breaking them!

APPENDIX
Sunset and sunrises are generally great, but even the hard light of midday can return exulting colours, especially if you plan shots where crystal clear water is involved. You can’t shoot at sunrise or sunset because, well, it is generally dark.
In this case, feel free to use a polarizer filter, but pay attention to not exaggerate its use because it’s really easy, in these situations, to end up collecting blue halos, or even worse, artifacts. Alternatively, you can play with long exposure filters, perhaps by combining two of them to prolong exposition even further. Obviously in these cases you’ll need really high quality filters. The Edge filters are great for that as I shot sharp photographs, even with a ND32000 combined with another ND slide filter.
Bad weather isn’t necessarily bad. A tropical storm can be exulting or interesting to shoot, but just protect your gear with some kind of hood in case of really heavy rain, and do all you can to avoid water drops on the lens. But taking long exposure or capturing photographs using time-lapse, or even lighting, can give you some great shots.
Of course, another thing you can do is sit down and wait until the sun breaks through the clouds, and then you’ll capture a true natural wonder.
If you plan to shoot in a very hot environment, or in full sunshine, then do take into consideration the fact that lenses and cameras are usually black, and they can become really hot if left exposed to the sun. Just cover them with a white cloth or something that doesn’t become so hot. In that way you will avoid any malfunctioning of some camera or lens part, or mechanisms. In some extreme situations I had to cover the camera with a wet white bandana.
Go into water, if you can. Just walk carefully, watching where you place your feet, but don’t worry about the water as long as you don’t drop your gear. A few drops of sea water won’t destroy your kit, but just remember to wipe them, later in your hotel, with a sweet water-humid cloth. In that way you’ll be collecting some more interesting points of view; okay, the shots taken from the beach are great, but from the water point of view, they can be even greater.
The sky is limitless, and even if you’ve got a really wide lens, sometimes it isn’t enough, so be prepared to stitch some photographs together into a unique panorama. Shoot them in portrait mode, overlap half of the previous shot with the next, and once at home, use a software package for stitching panoramas together in order to get your large view. The technique is easy; however, it can be enriched by just taking several minor precautions, which I’ll discuss in detail in another dedicated article. Or just check out some tutorial online. All I can say is that with the 11mm, stitching a panorama returns incredible shots and skies with a really limited distortion.
Colours in tropical paradises are astounding. Flowers are gaudy, and vegetation is really showy. Do be prepared for high saturation shots, but pay attention that you don’t distract the observer with something that’s too coloured and in the wrong place. Here, like in any other type of photography, composition is king. Avoid placing something in the shot that ends up in capturing the attention of the observer on a second plane with rich tones, or it will become your main subject in the wrong position. If you can’t avoid it, then it’s better to hide it through composition or be prepared to remove it in post-production.
Be ready for some night shots. In such places there’s low light pollution, so you can even touch the stars. Again, carefully plan your shots. Use apps like Photopills or TPE to check where the Milky Way or the moon phases will be. Use a trigger to capture the star revolution or do some star-stacking with the Milky Way.
Last but not least, one piece of advice which I feel I should give is this: don’t worry! If the perfect shot doesn’t arrive, well, don’t forget that you are, after all, in a tropical Paradise. So just relax, order a fresh drink, sit down, and enjoy where you are. It’s fantastic! Okay, it can be hard work, but somebody has to do it…
If you have an interesting idea for a guest post, you can contact me here.